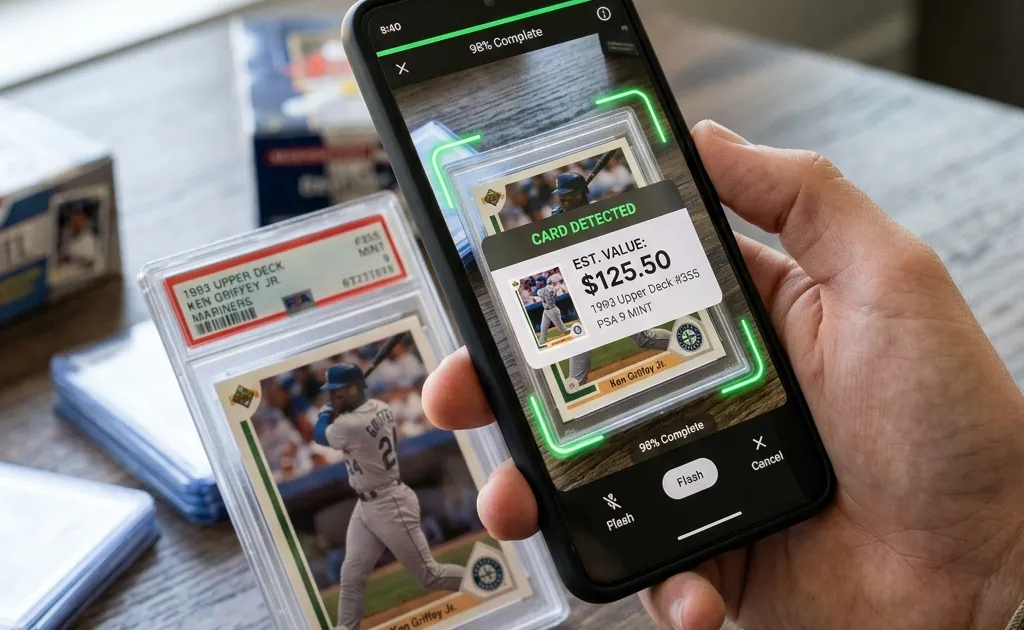
To scan a sports card well, use bright indirect light, place the card on a plain contrasting background, hold the camera parallel to the card, and keep all four edges visible. Then verify the suggested year, set, card number, and variation against the physical card before researching value.
A scanner can shorten identification, but it cannot see details hidden by glare, a sleeve, a soft photo, or the wrong side of the card. The goal is not merely to get a result. The goal is to produce enough visual evidence for a reliable candidate and then confirm that candidate yourself.
The two-minute capture checklist
| Check | Good capture | Why it matters |
|---|---|---|
| Light | Bright and indirect, with no white reflection across the card | Glare can hide foil, text, serial numbers, and surface patterns |
| Background | Plain and visibly different from the card border | Makes the card edges easier to separate from the scene |
| Camera angle | Phone parallel to the card | Reduces perspective distortion and keeps borders comparable |
| Framing | All four corners and edges visible | Prevents important design and condition details from being cropped |
| Focus | Card number and fine print are readable | Player recognition alone is not enough for an exact match |
| Protection | Card remains safely sleeved when removal creates risk | A clearer image is not worth damaging the card |
| Coverage | Front and back photographed | The back often confirms year, set, manufacturer, and card number |
Use this checklist before changing apps or assuming a card is unsupported. Many failed matches begin with missing visual information.
Step 1: Prepare the card without risking damage
Dust or fingerprints on the outside of a sleeve, toploader, or slab can catch light and confuse the image. Clean only the outside of the holder with an appropriate soft cloth. Do not clean, flatten, trim, or alter the card itself.
You do not need to remove every card from protection. A common raw card in a scratched team bag may be safer to photograph after removing the outer bag, but a valuable card should not leave a secure holder simply to make a scanner’s job easier. Instead, change the light source, background, or camera angle.
Before scanning, note any detail that may distinguish the card:
- a printed card number on the back;
- a serial number such as “12/99”;
- an autograph or memorabilia statement;
- a refractor, prizm, holo, wave, color, or patterned finish;
- a variation code or different photograph;
- a grading company, certification number, and grade.
These details become your verification checklist after the scanner suggests a match.
Step 2: Build soft, even lighting
Window light can work well when direct sun is not striking the card. Two lamps placed to the left and right can also reduce a single harsh reflection. The exact setup matters less than the result: the text, borders, and surface pattern should remain visible from corner to corner.
Avoid relying on the phone’s flash. A flash can create a bright central hotspot on glossy cards and a broad reflection on slabs. If the room is dark, add light to the scene instead of aiming one intense light directly at the card.
For chrome, foil, or refractor-style cards, move the lights while keeping the camera parallel. A small change in light angle may reveal the pattern without changing the card’s shape in the photo. Take two images if needed: one that shows the printed details clearly and one that reveals the reflective finish.
Step 3: Choose a contrasting background
A simple background helps you notice whether the whole card is present. Use a dark neutral surface for cards with light borders and a light neutral surface for cards with dark borders. Avoid patterned playmats, stacks of other cards, hands covering corners, or objects that create extra edges.
The background should also be safe. Use a clean, dry, flat surface with no grit that could scratch a card or holder. If you use a stand, make sure the card cannot slide or fall.
Step 4: Hold the camera square and steady
Position the phone directly above the center of the card. Keep the long edges of the card parallel with the edges of the screen. Leave a narrow margin around all four sides instead of filling the frame so tightly that a corner is clipped.
Tap the card on screen to focus if the camera allows it. Wait until the card number and small text look sharp. If the phone keeps focusing on the plastic holder, increase the distance slightly and crop later rather than moving so close that the image becomes soft.
For a landscape card, rotate the phone or card so the design fills the frame naturally. Do not submit a screenshot of a tiny card surrounded by a large webpage or marketplace listing when you can use the original image.
Step 5: Photograph the front and the back
The front is useful for the player, team, design, insert name, autograph, memorabilia, and visible parallel pattern. The back may be more decisive because it can show:
- manufacturer and copyright year;
- set or product wording;
- card number;
- player statistics that narrow the release year;
- authentication or grading information;
- text identifying an insert, variation, or reprint.
Even if a scanner accepts only one image, keep the back photo open for your manual review. A front-only match should remain provisional when the back contradicts it.
Step 6: Review the suggested match field by field
Do not stop at the player name. Verify every available field:
- Player and team: Does the uniform, team mark, and printed name agree?
- Year: Is it the card’s release year rather than a copyright or statistics year taken out of context?
- Manufacturer and product: Is it the correct flagship, premium, update, draft, or specialty release?
- Set and card number: Does the printed number match the checklist entry?
- Card type: Is it a base card, insert, parallel, variation, autograph, memorabilia card, or reprint?
- Serial numbering: If numbered, does the candidate describe the same print run?
- Grade: For a slab, are the grading company and grade recorded exactly?
If one important field fails, treat the result as a search lead rather than a match. Search the player, year, manufacturer, visible set name, and card number together. For baseball, use the more detailed free baseball card value lookup workflow.
Step 7: Separate identification from valuation
A correct identity does not create one permanent value. Condition, grade, market timing, scarcity, player demand, and the relevance of comparable sales all affect the range a buyer may pay.
After verifying the card:
- Find several recent completed sales of the exact card.
- Compare the same parallel, variation, autograph, or serial-number range.
- Keep raw cards separate from graded cards.
- For graded cards, compare the same grading company and grade when possible.
- Exclude active asking prices, unrelated lots, reprints, and obvious mismatches.
- Record a reasonable range and the date of your research.
Read the full sports card valuation guide and our value methodology before using an estimate for a buying or selling decision. A scanner estimate is not a certified appraisal or guaranteed sale price.
Troubleshooting common scan problems
The scanner finds the player but the wrong card
Capture the back and make the card number readable. Add the year and product name to a manual search. Check whether the image is an insert, update-series card, reprint, or photo variation rather than the expected base card.
It selects the base card instead of a parallel
Take a second image that shows the surface pattern or color. Check the serial number and any parallel name printed on the card or grading label. Compare against a product checklist. Do not assume every color difference represents the same named parallel across manufacturers.
A sleeve or slab creates glare
Turn off the flash. Move the light source to the side and raise the phone slightly. A dark cloth placed beyond the camera can reduce bright objects reflected in glossy plastic. Keep the card protected if removing it could introduce damage.
The photo is sharp but no match appears
The card may be outside the tool’s current coverage, too obscure for the available references, or visually similar to several candidates. Search manually using the card number, manufacturer, and distinctive text. Try the sport-specific guides for baseball, basketball, or football.
The result shows an unrealistic value
Inspect the comparisons. A value can be distorted by the wrong parallel, a different grade, a lot containing multiple cards, an active asking price, or an old sale. Rebuild the comparison set using exact, recent completed sales.
Use a ten-card test before scanning a collection
Before committing hundreds of records to any tool, test ten cards that represent your actual collection:
- two common modern base cards;
- two parallels with visible differences;
- one insert;
- one serial-numbered card;
- one older or vintage card;
- one graded card;
- one foil card that produces glare;
- one intentionally difficult or obscure card.
Create a small worksheet with columns for player, year, product, set, number, variation, scan candidate, confirmed result, and correction needed. The worksheet is an original record of how the tool performs for your cards. It is more useful than a general accuracy claim with no disclosed sample.
Our free scanner app comparison explains what else to test, including collection tools, export options, current access limits, and marketplace features. If you prefer not to install an app, compare the tradeoffs in online sports card scanners versus mobile apps.
Save a record you can verify later
When you add a confirmed card to a collection, save the fields that prevent future confusion:
- exact year, manufacturer, product, set, and card number;
- base, insert, parallel, variation, autograph, or memorabilia type;
- serial number, if present;
- raw condition notes or grading company and grade;
- front and back images;
- research date and a link or note explaining the value range;
- a personal location such as binder, box, or display case.
Check whether your chosen tool offers an export before building a large inventory. A portable record makes it easier to change tools, create insurance documentation, prepare a sale, or audit earlier identification work.
A better scan is only the first step
Good lighting and framing improve the evidence available to a scanner. Verification turns a candidate into a usable identity. Comparable-sales research turns that identity into a defensible value range. Keep those steps separate and you will avoid many of the expensive mistakes caused by confusing a similar-looking card with the exact card in hand.
You can apply this process with the SportsCardValue scanner workflow and download the app from the Apple App Store or Google Play. Confirm every suggested match before adding it to a collection or using it in a transaction.
Identify and Research Your Sports Cards
Download the Sports Card Scanner & Value app to identify, catalog, and track baseball, basketball, and football cards. Confirm the exact card and condition before relying on an estimate.